
Once upon a time, some moons ago, I made it my goal to learn how to do the splits. Front splits to be exact, as box splits will never be something I can do (although I should never say never!).
Back in 2013, I did actually get very close, so close my front splits could have passed as being successful to be honest. But since then, more notably in the past year, my flexibility seems to have gone astray.
So now was the perfect time to dig up all my old content on stretches for splits, reshoot the imagery and refresh the content. You don’t have to wanna do the splits to use the stretches either.
They’re all rounders for lower body flexibility which will help reduce the risk of injury (whatever your choice of sport) and help you recover faster if you use them post exercise.
What is Stretching & Flexibility?
Flexibility is commonly described as the range of movement around a particular joint or set of joints. Stretching is the process of placing particular parts of the body into a position that will lengthen the muscles and associated tissues, therefore increasing flexibility.
Improving your flexibility and achieving splits is gonna take some deception by the way. These stretches should for the foundations of your stretch routine and you will need to complete at least 10 minutes of stretching per day to start seeing improvements.
How To Keep Track Of Your Progress
Before you start you your splits journey, I would suggest you take a measurement of your starting point using the Sit and Reach Flexibility Test. Essentially, sit and reach is a simple measurement of lower back and hamstring flexibility and in addition to the front splits themselves, it’s a great way to see your progress.
Outside of wanting to be able to so the splits, maintaining hamstring and low back flexibility may reduce your risk of injuries and low back problems, postural issues and risk of falling.
How To Do A Sit & Reach Test
Before you do the sit & reach test, you should do a quick warm up and static stretch routine, focusing on the lower body.
Typically, you’d use a sit & reach test box for this, but chances are, like me, you don’t have one of those lying around at home. You could make one out of a box otherwise, options are to use a step, or another flat surface.
You’ll need some form of ‘stick’ to push and a ruler / tape measure for measuring results.
Take off your trainers and come to seated on the floor with your legs stretched out in front of you, knees straight and feet flat against the step / box.
No step or box, no big deal. Just make sure you test in the same way each time. Using the edge of a rug is a good option to use. Pop your ‘stick’ inline with the edge of the rug behind your heels.
Moving slowly and steadily, leaning forward from the hips, reach your hands towards the ‘stick’ to push it as far away from your heels as you can.
Once you’ve extended as far as you can, record the result in cm, rest and repeat three times. Average your results for your final score.
Benefits of Splits Stretch
In yoga, the fronts splits pose is known as Hanumanasana (hah-new-mahn-AHS-anna). This yoga pose has many benefits including stretching of hamstrings, groin, and hip flexors as well as strengthening the muscles of the pelvic floor and abdomen.
4 Simple Stretches For Splits & Flexibility
I put together this post with some simple stretches for splits you can do at home whcih focus on the hip area, quads and hamstrings. These can be added into a routine of yoga classes (check out yoga classes on the FIIT app), splits specifics workshops offered in your local studios and other stretching.
A few things to remember:
- Warm up prior to stretching
- Stretch gently and slowly
- Stretch ONLY to the point of tension; stretching should never be painful
- Breathe slowly and easily while stretching
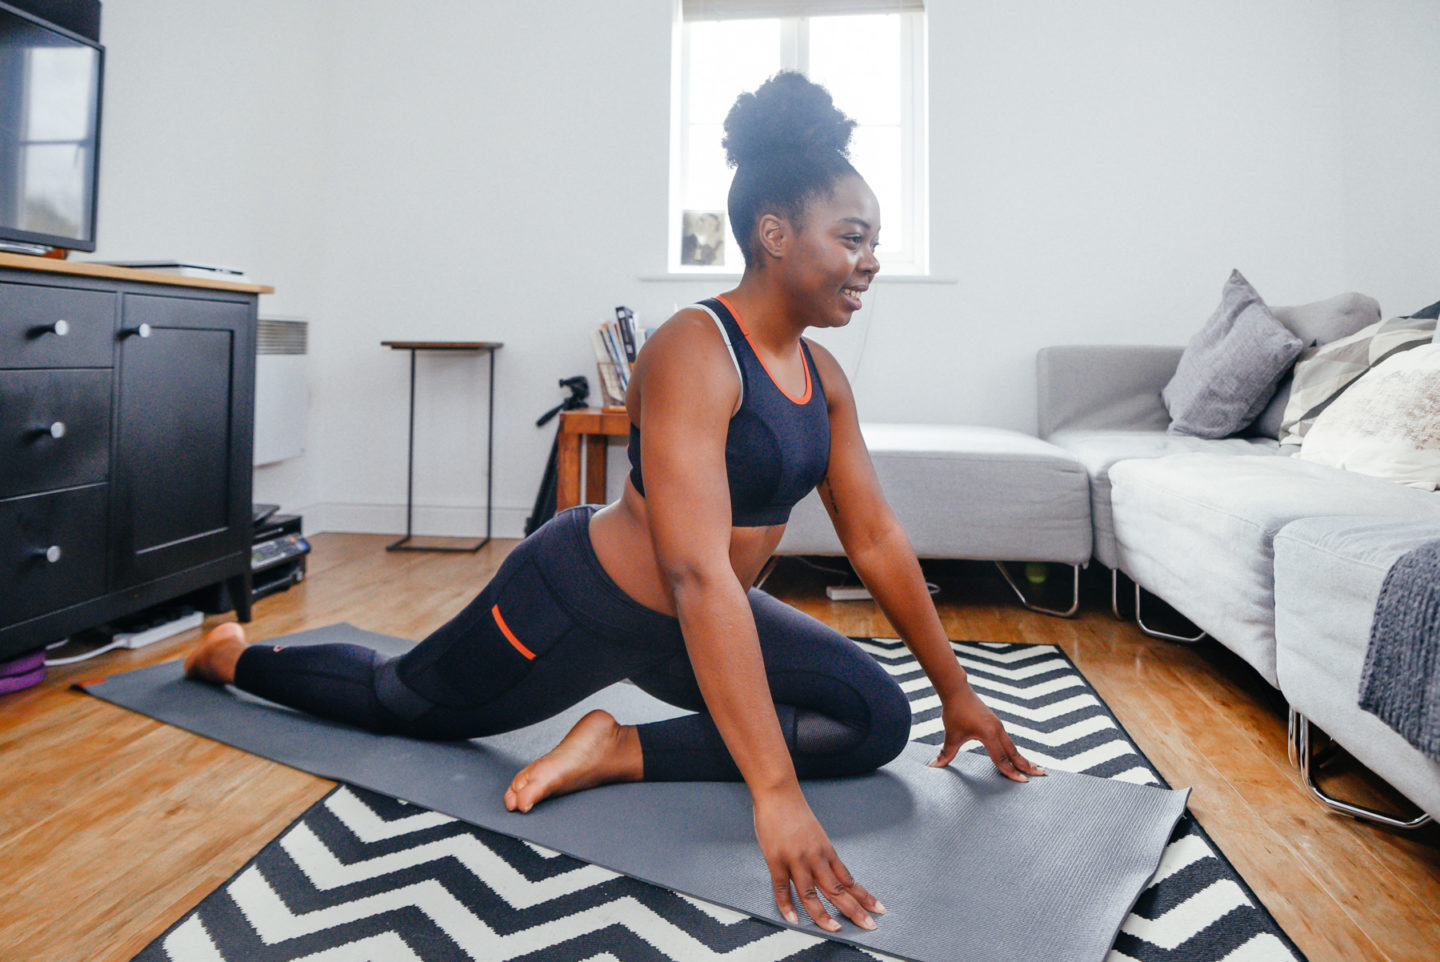
1/ Kneeling Lunge Stretch
Beginner: 30 seconds on each side
Intermediate / Advanced: 1-3 minutes on each side
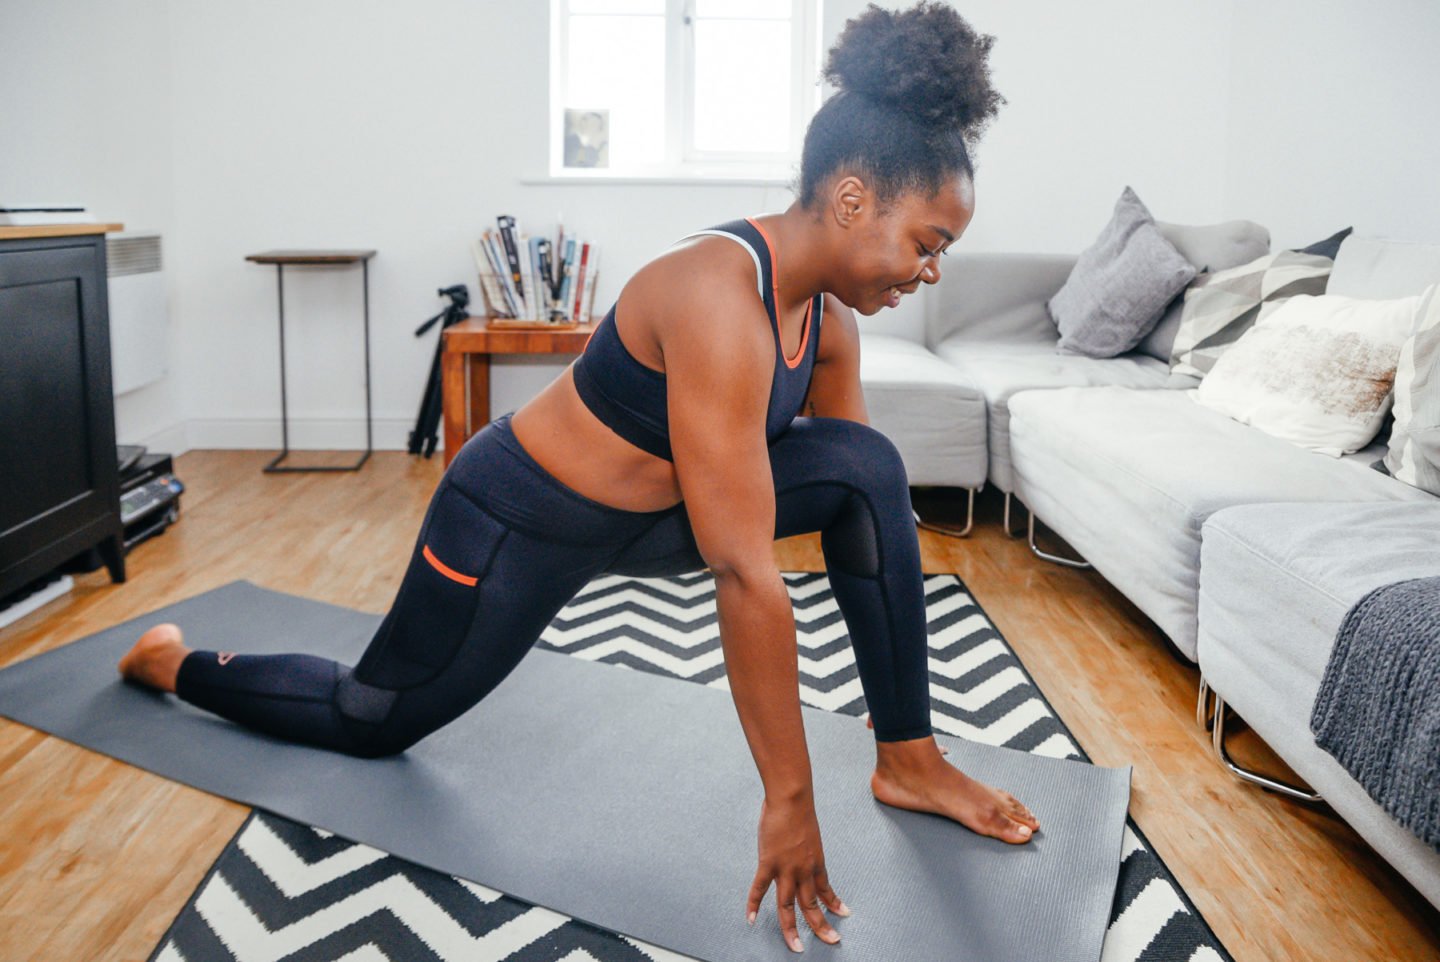
- Kneel on one knee with your other leg in front of you, knee bent.
- Push your hips forward to feel the stretch on the back leg (quadriceps: upper front part of thigh).
- You can then increase the stretch by holding your back foot with your hand whilst pressing your hips forward to deepen your lunge.
2/ Reverse Lunge Stretch
Beginner: 30 seconds on each side
Intermediate / Advanced: 1-3 minutes on each side
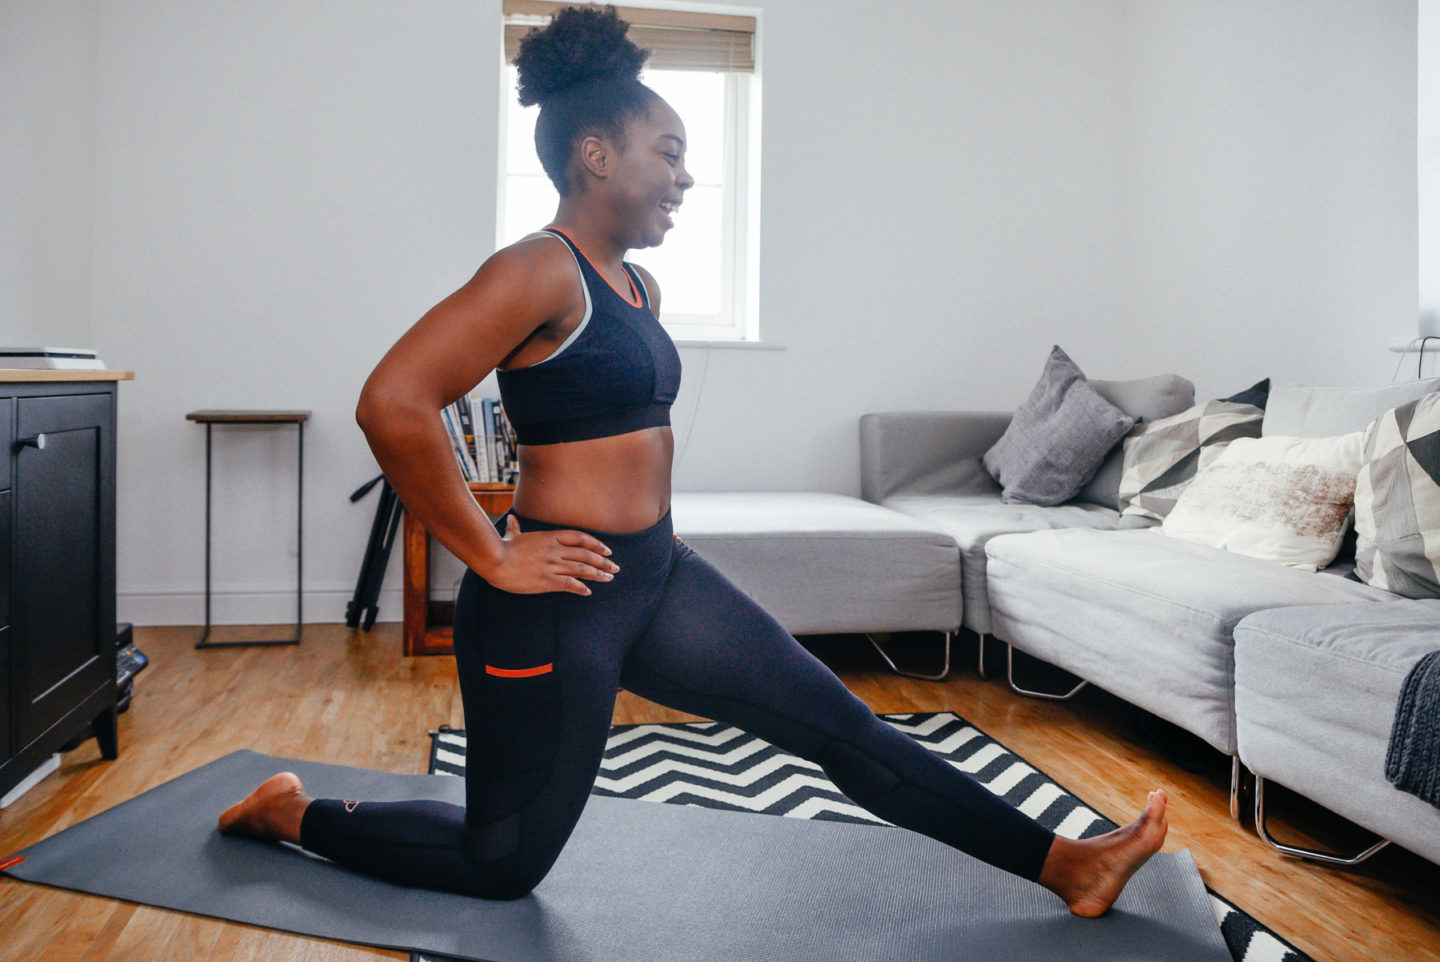

- Kneel on one knee and place your other leg out straight in front of you with your heel on the ground.
- Try to keep your back flat as you reach towards your toes with your fingers, then chest and forehead.
3/ SINGLE LEG STRETCH
Beginner: 30 seconds on each side
Intermediate / Advanced: 1-3 minutes on each side
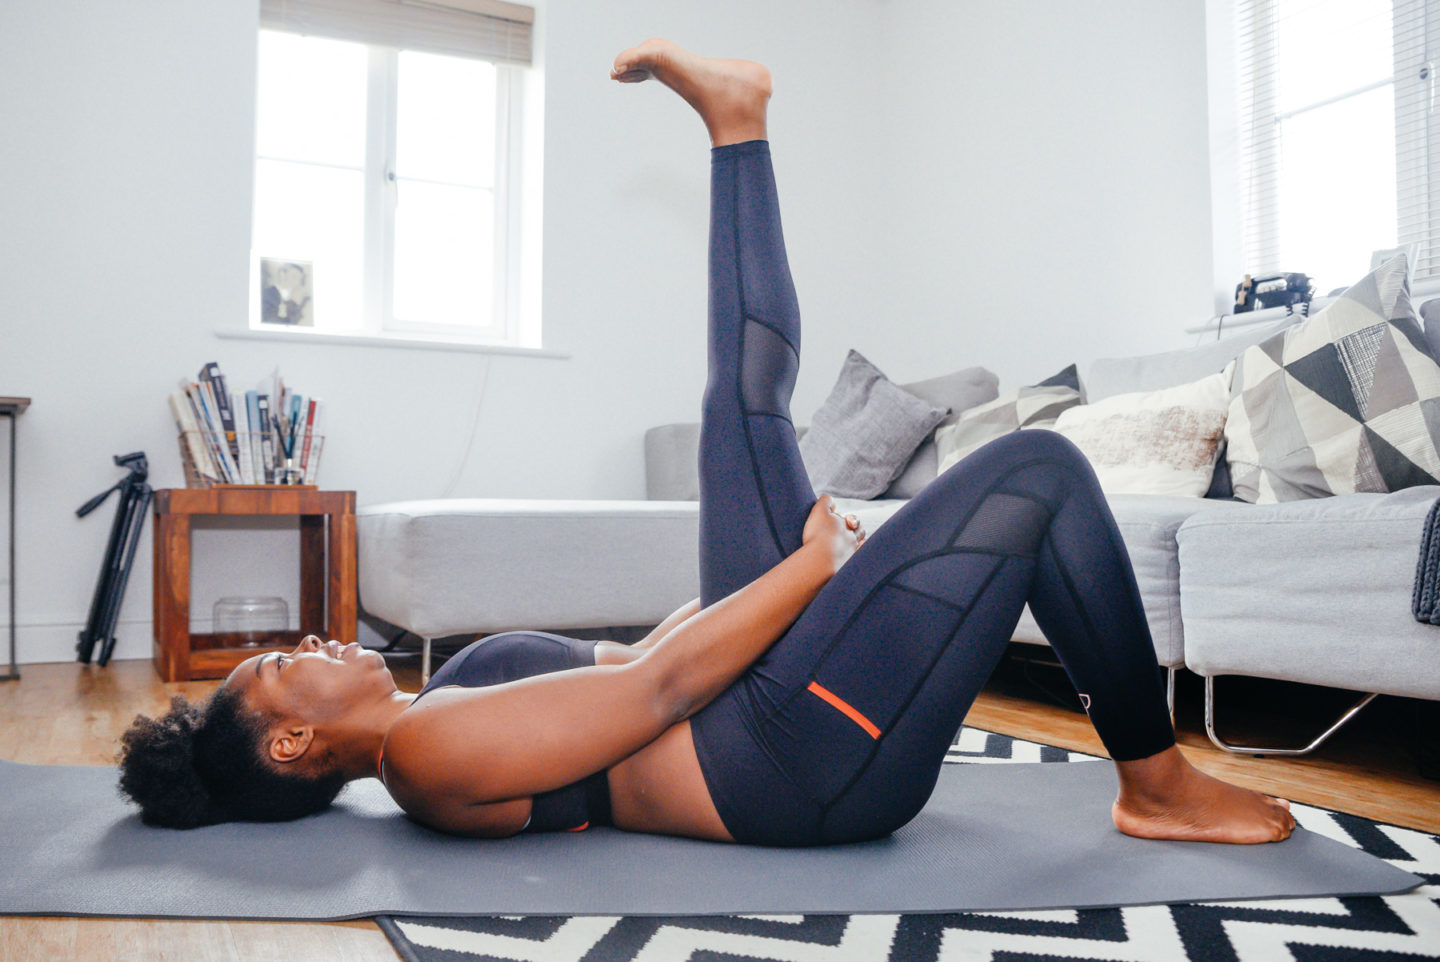
- Lie on your back with one knee bent and one leg raised straight
- Hold the straight leg either above or below the knee joint (never directly on the knee joint)
- Use your arms to bring your straight leg towards your chest.
- Hold the position for at least 30 seconds.
- If / when you feel the stretch easing, take a deep breath in and when you breathe out see if you can bring your leg any closer to your chest.
4/ PIGEON STRETCH
Beginner: 30 seconds on each side
Intermediate / Advanced: 1-3 minutes on each side
- From downward facing dog, step both feet together and bring your left knee forward so your outer leg is resting on the mat.
- Breathe into areas of tightness.
- Hips should be pointing toward the mat not the ceiling.
- If your flexibility allows, lower your chest and forehead towards the ground.
So, let’s get bendy! Set yourself a goal of 10 minutes stretching for 30 days to begin and see how far you get. Don’t forget to take progress pictures so you can actually see the difference between day one and day thirty… take more photos in between to keep as a diary and chart your progress over the entire time.
Have you made front splits one of your 2020 goals?! Or do you have another “out there” goal for the year?
Elle
P.S Safety always comes first. If you are new to exercise ensure you seek advice from your GP. Make sure you drink plenty of fluids, wear appropriate clothing and carry out drills in a suitable space. Technique is paramount, and nothing should hurt. Should you experience pain, discomfort, nausea, dizziness, chest pain, shortness of breath etc, STOP and consult your GP.
![3 Effective Exercises For Glute Activation [+Workout]](https://www.keepitsimpelle.com/wp-content/uploads/2020/11/good-morning.jpeg)

This was so helpful! I was looking for some step by steps on Pinterest, and found yours. I am dying to be able to do the splits but I’m a long way off being able to do it so I’ll give these a try xo
I was a long way off too… and am again, but I pretty much got there when I stretched consistently! Good luck on your splits journey!